")
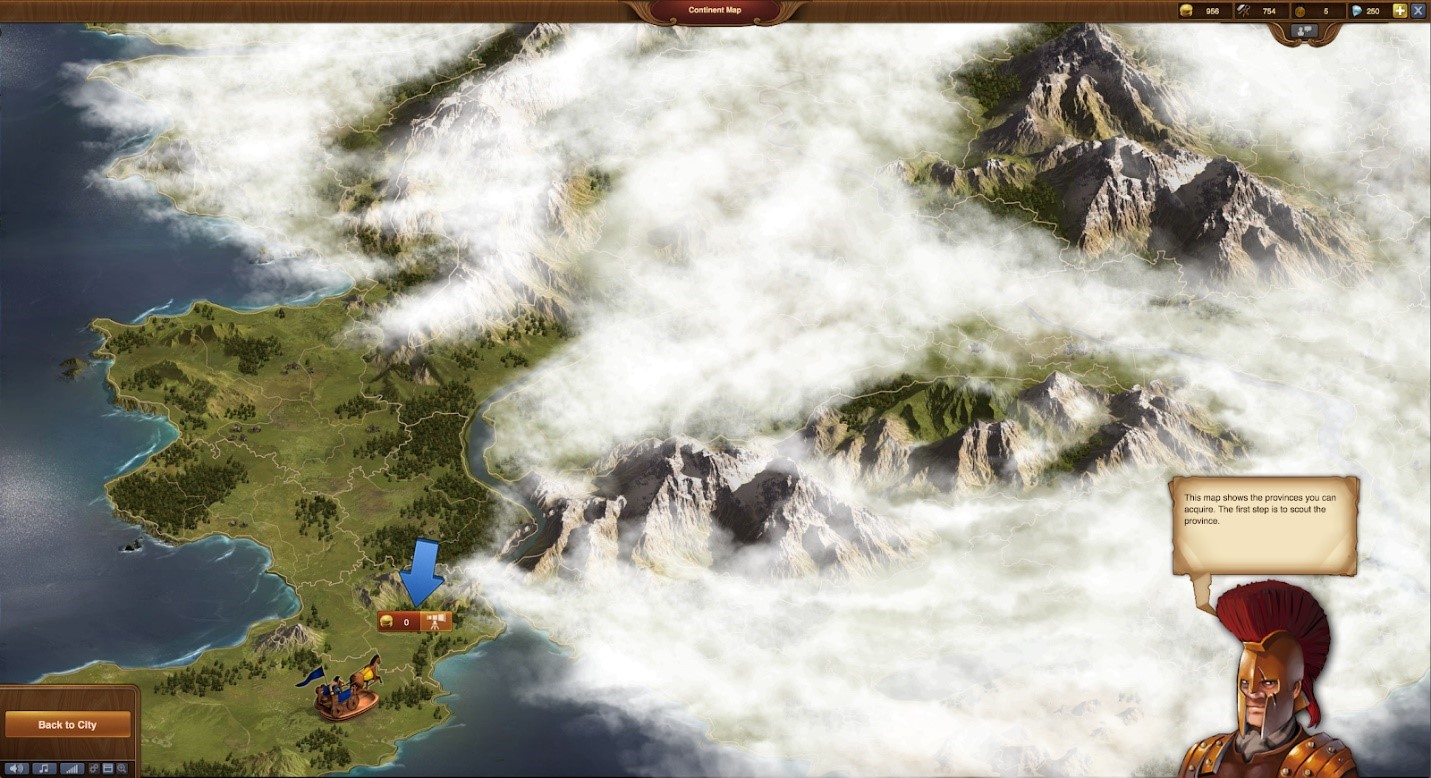
One of the key elements of “Forge of Empires” is the conquest through other empires. Users have the choice to attack or trade with other kingdoms; in the early parts of the game, trading is much more difficult due to a lack of supplies. The goods demanded by the other rulers are created through production buildings that require multiple steps of research to complete. As such, early progress through “Continent Map”, or series of other empires, requires users to battle their enemies.
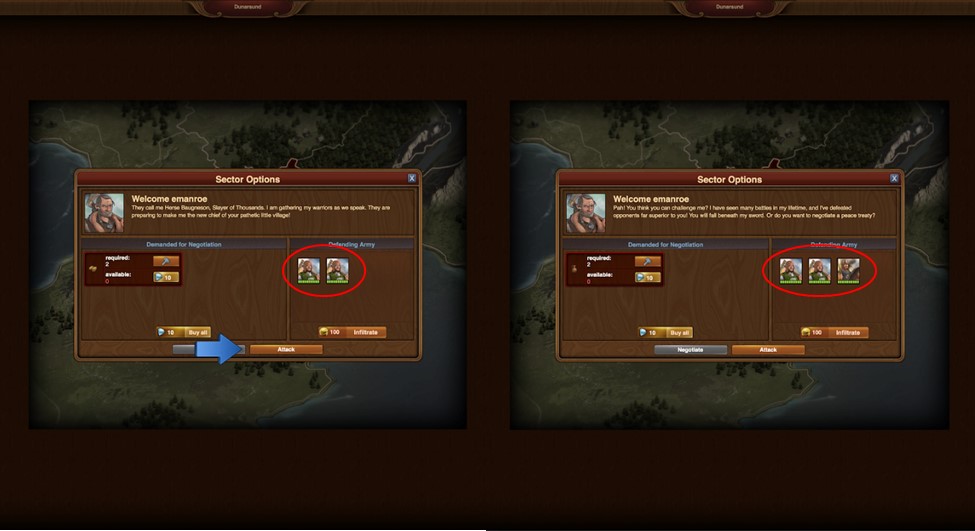
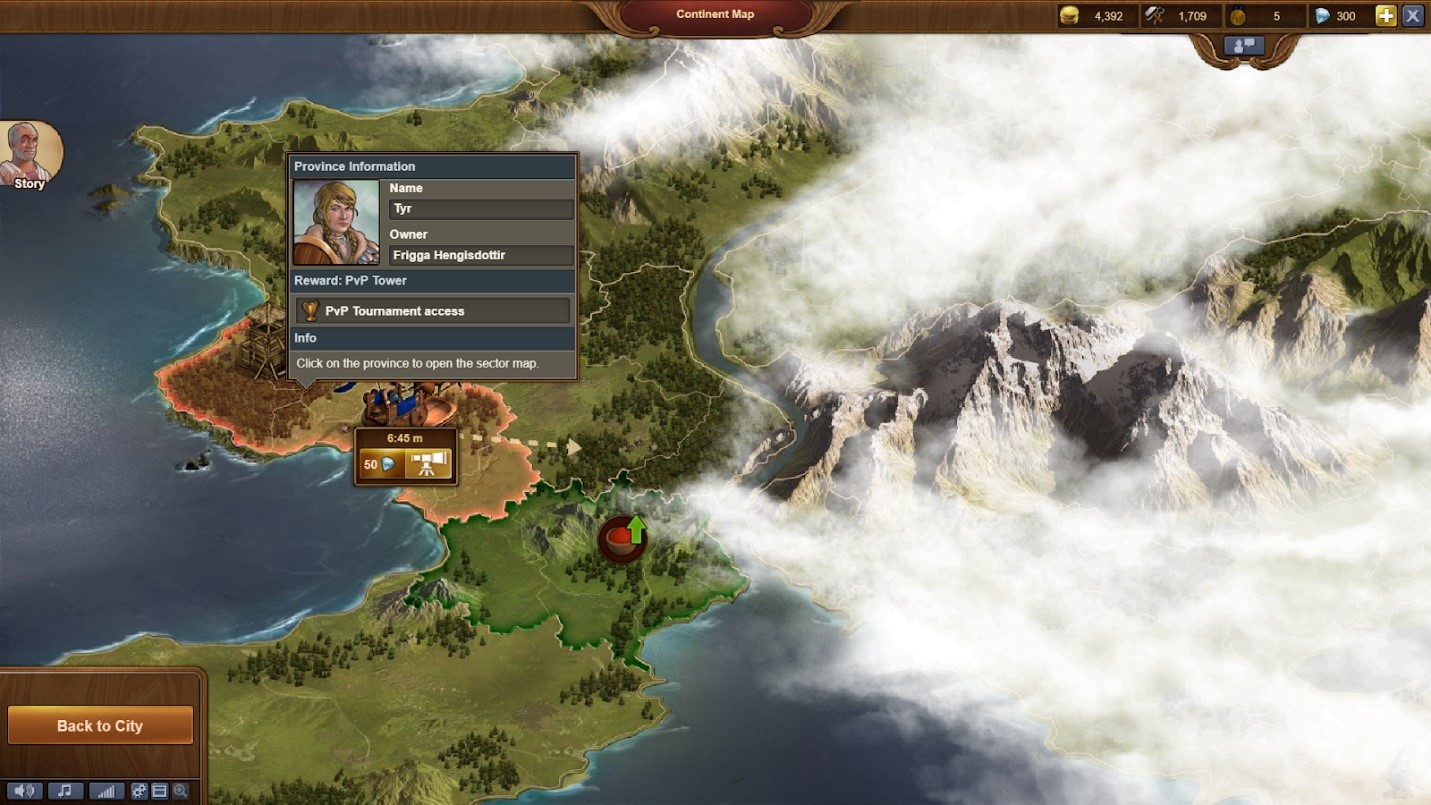
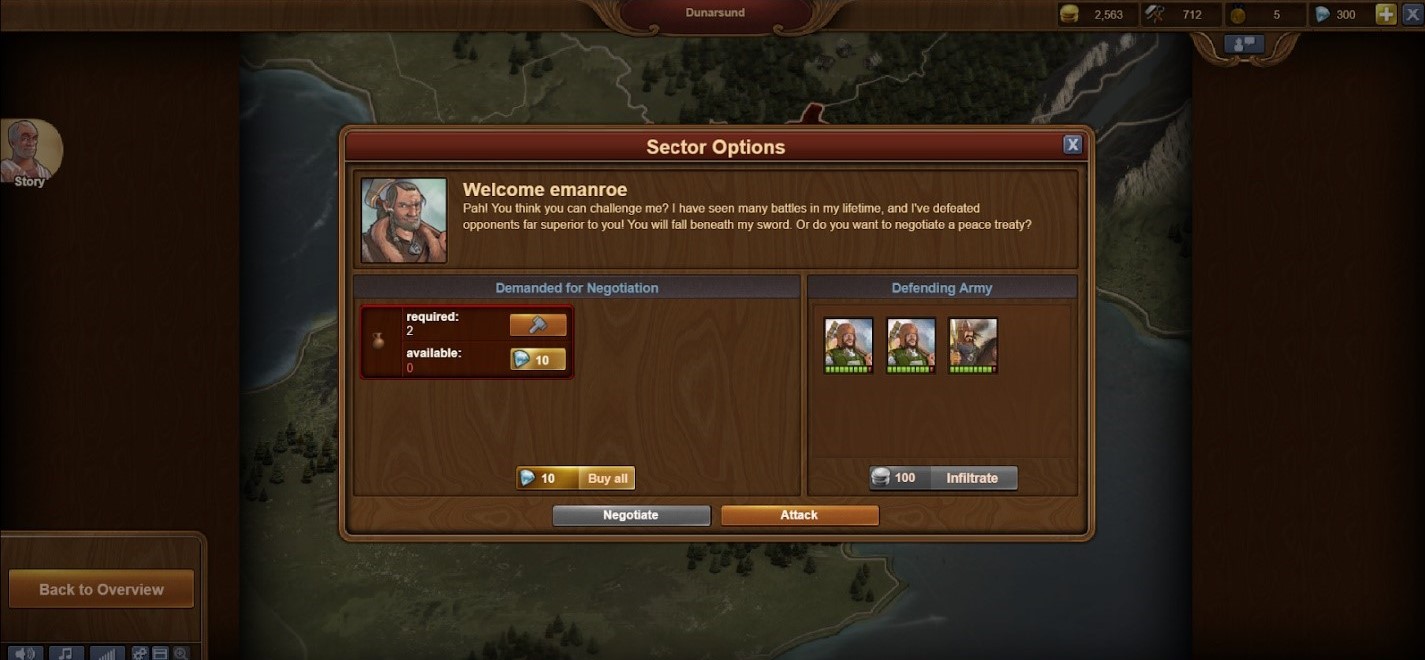
Conquesting a province is not a single battle; on the contrary, one ruler will control three or four areas that yield a variety of resources (coins or supplies). In order to conquer a full region, and gain the according boost (i.e. increased flower production for dye, increased grape production for wine, or land expansions for the user’s own kingdom), the user must defeat all regions held by the ruler. Interestingly, your actions on the first region do not seal the deal for all regions: the user can choose to battle for some regions and trade for others. This can be especially helpful with heavily-guarded regions: though under the same ruler, regions do not fight with the same army strength or composition.
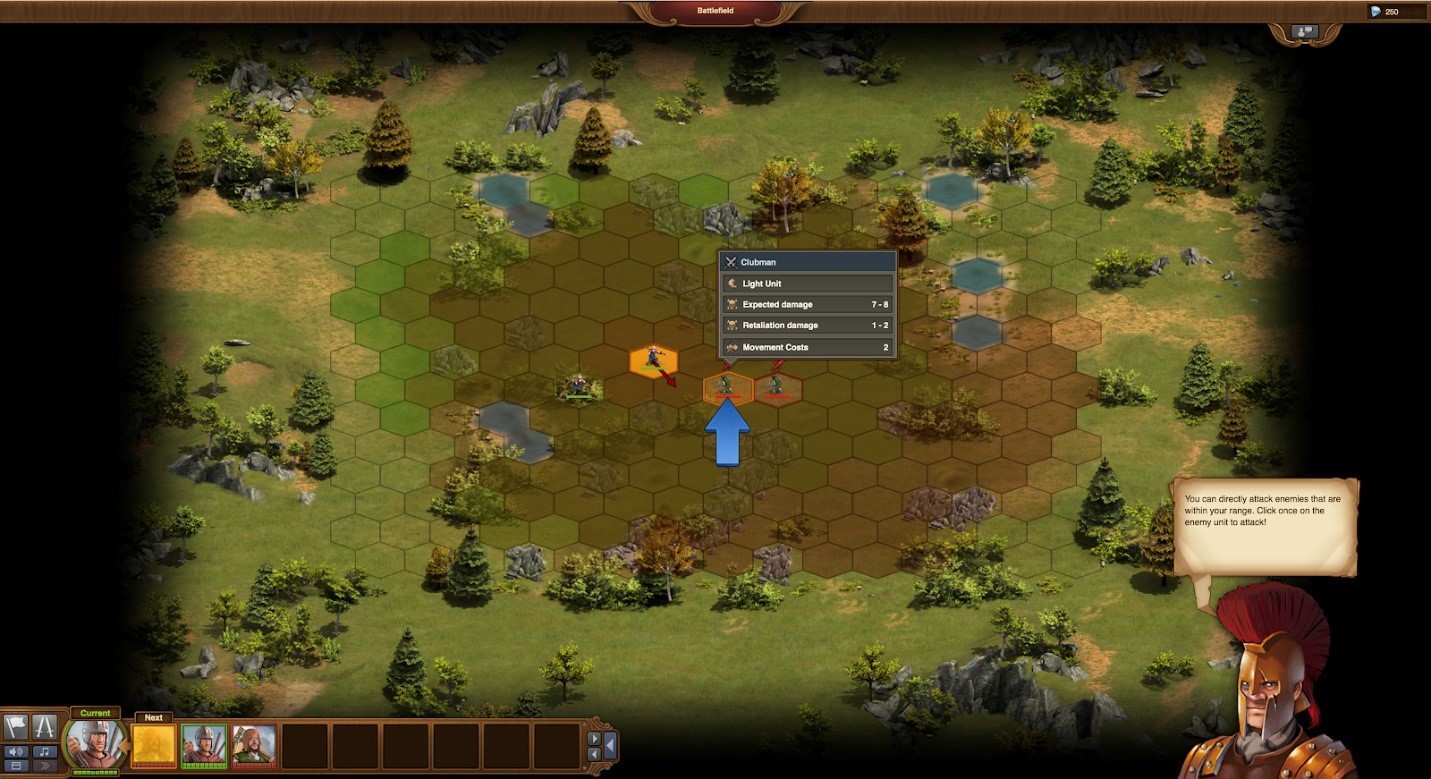
Once you enter the battlefield, things get a bit interesting. The field is set up like the sideways-view of a chessboard: each side starts on opposing ends of the area and advance towards each other. The pieces of the field are hexagonally-shaped to allow for more freedom in movement. Each type of fighter (i.e. soldier, horseman, rock slinger, warrior) has a different allowance of spaces they are allowed to move in a certain turn. If you choose to move the fighter less than their allowance, you have the opportunity to move them the remaining spaces before their turn ends. In the bottom right corner, the game provides the sequence of fighters, so you know when you will be able to move which fighter, as well as when your opponent will have the option to move each of their fighters. This lets you plan and prioritize attacking or protecting certain fighters at certain times. Eventually, the user will build a strategy using these different aspects; this is not something that I have mastered quite yet. Currently, my strategy is a straightforward rush attack. It’s working moderately well, but I am losing more fighters as I progress to stronger and more diverse armies.
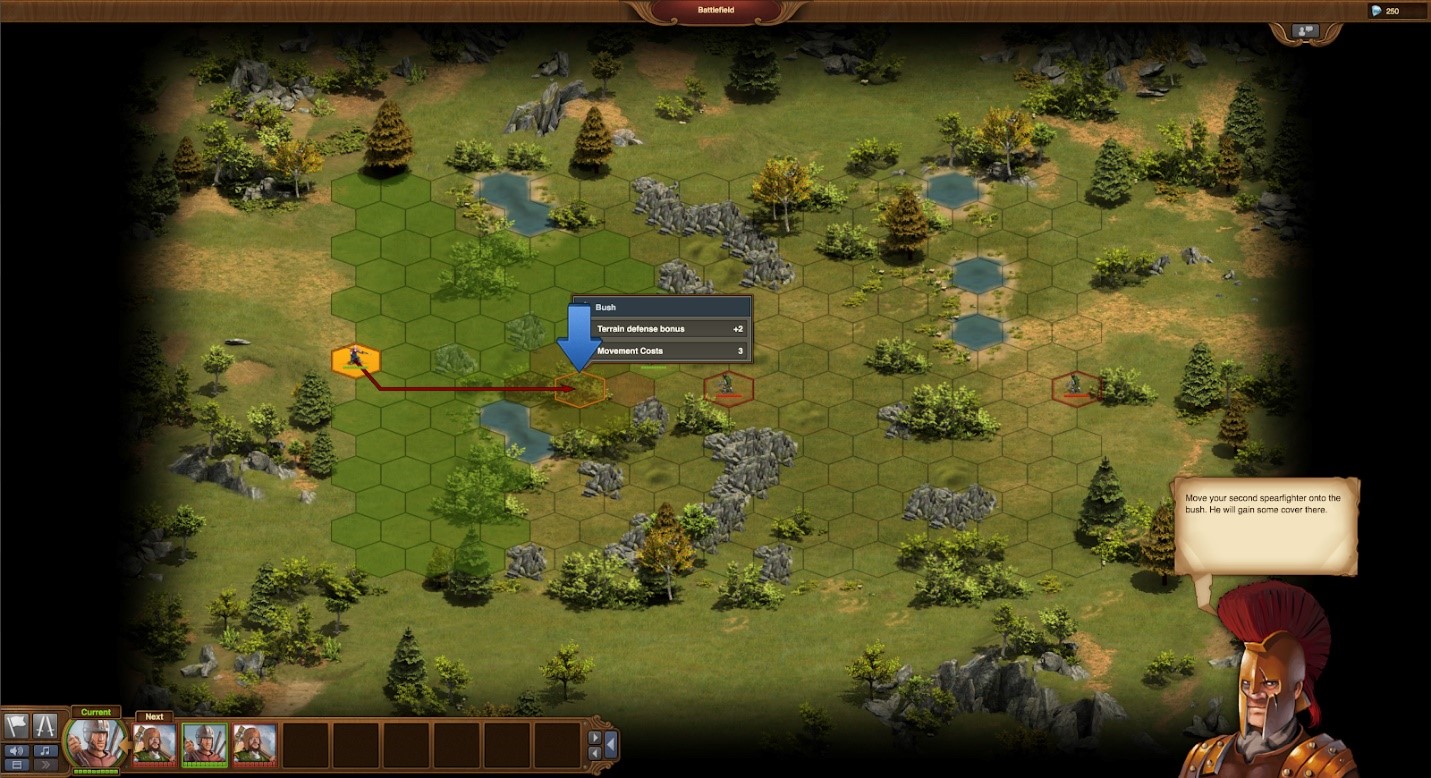
As soon as you get close to the enemy, the game places a little sword over the heads of fighters you can attack. This is incredibly helpful to users (like me) who still haven’t mastered the move allowance mechanics. If you hover over each of the fighters, the game shows you what type of fighter they are, how much damage you can do, how much damage they will retaliate with (immediate, prescribed attack against the soldier who is attacking), and also how far you have to travel to reach the enemy.
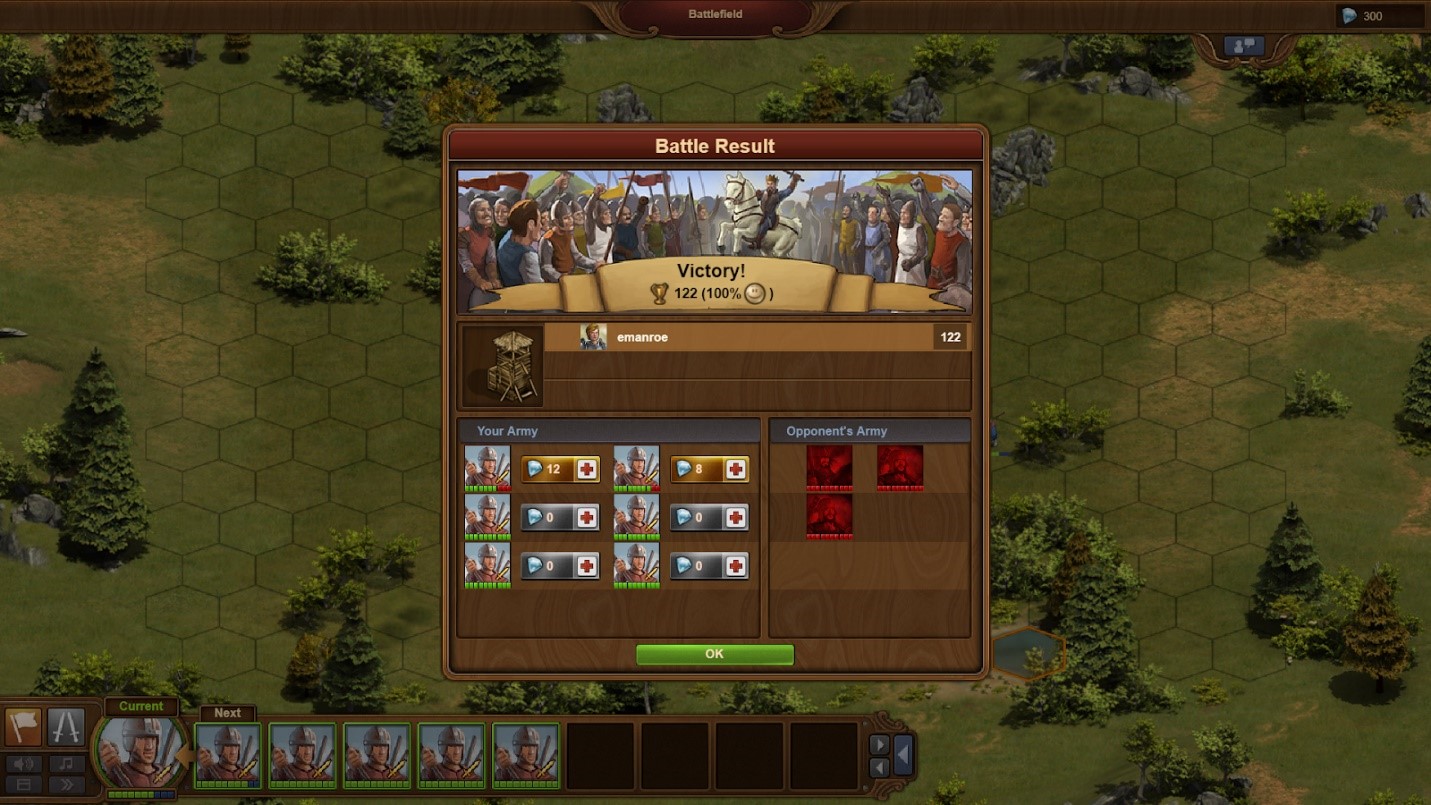
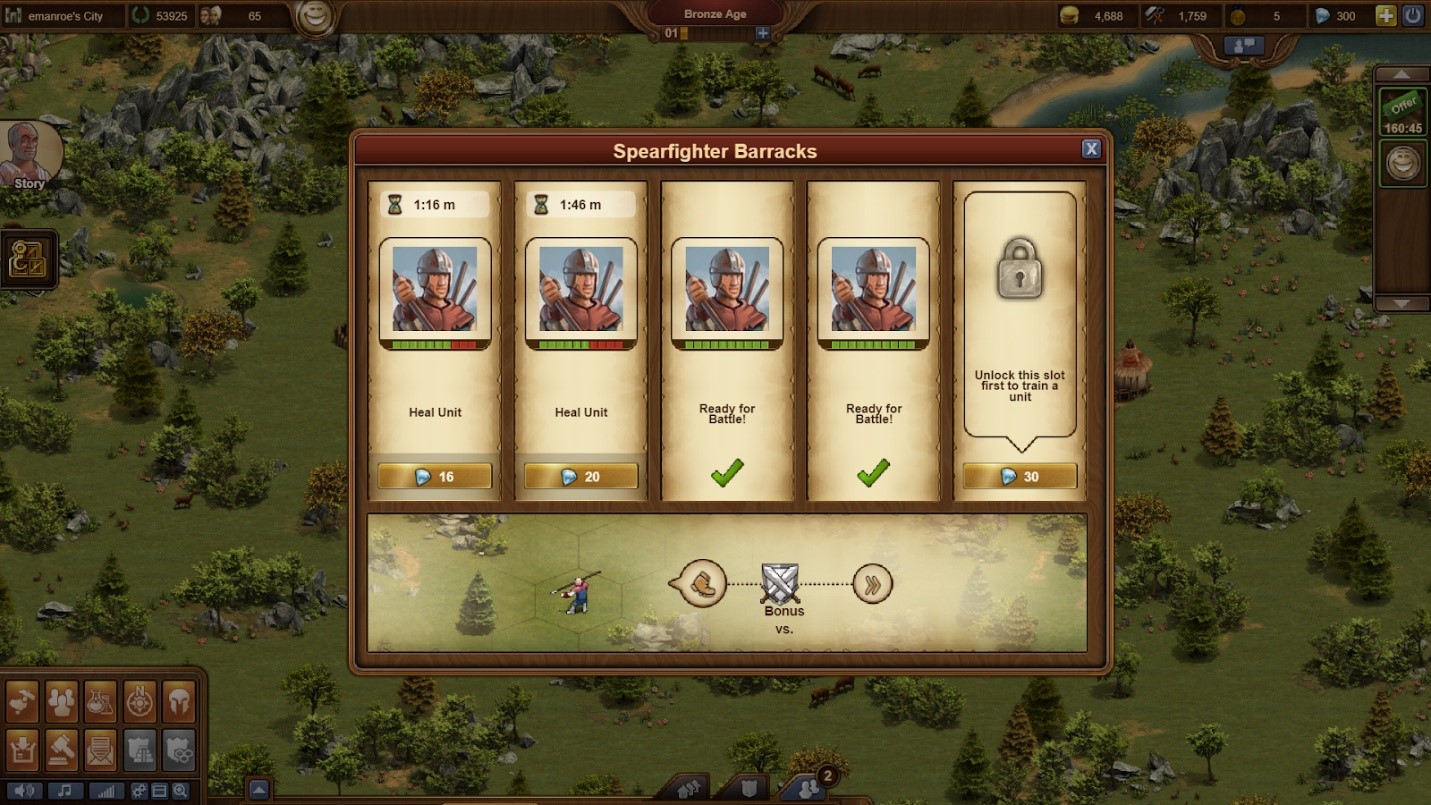
Once all is said and done and one side’s fighters have all been killed (preferably the enemy), the game presents a victory screen. This screen shows what the user gained from the battle, as well as how many/what types of fighters were lost. You have the option to heal or train all of your fighters with diamonds right then, or you can return to your empire and use coins and supplies. If your fighter was damaged but not killed, then you have to wait a certain amount of time for them to heal. If your fighter was killed, you have to pay coins and supplies (and wait a bit of time) to train a new fighter.
Once you have conquested an entire province, you have to scout the next province under a new ruler. This costs coins and takes a certain amount of time depending on your progress in the game. Like I said before, each province yields different boosts that affect the user’s own empire.
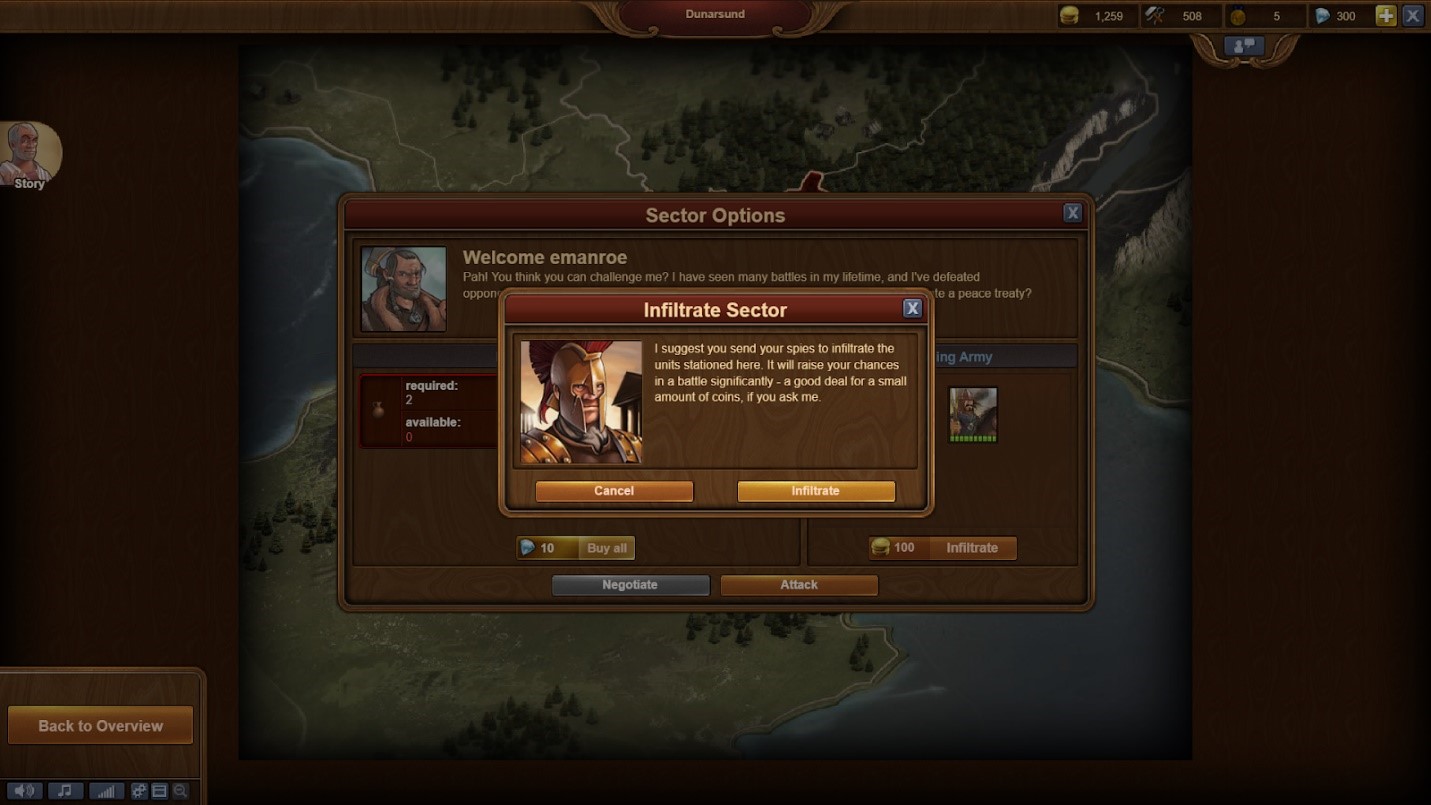
The only other wrinkle in battling that I haven’t covered that is a nuance prior to attacking. Users have the option to “infiltrate” their enemy for a coin fee; this removes one health notch from each of the opponent’s fighters. This was wonderful at first, but the coin fee increases drastically over time. I am not quite sure how much a single health notch equates to in battle strength, but I have won battles both using and not using this feature.
Other comments:
Avatar Choices- Back in their kingdom, users have the option to choose their in-game avatar. It took me a while to figure out how to actually do this; as it turns out, you can click/tap on your headquarters and edit your profile that way. The avatar choices themselves are interesting; there are both fantasy and more real-life characters, as well as male, female, and other genders. The avatar choices span time periods from medieval to modern to futuristic, and almost anything in between. However, since the avatars are quite unique and unconventional, it can be difficult choosing the specific one that suits your personality.
Game Menu Graphic User Interface- “Forge of Empires” has a multitude of menus and options, which can be incredibly daunting and difficult at first. However, the game designers did a pretty good job with equating image and option: for example, the little hammer opens the “build” menu, the little spartan mask opens “army management”, and the compass opens the “continent map”. Within each menu, especially the build menu, there are more sub-menus governed again by little icons. Since certain menus are unlocked through research, the early stages of the game yield multiple grayed-out buttons that will eventually open. Overall, I am much more proficient in the menus than I was when I first started the game, but I am nowhere near full competence. The menus are easy to navigate if you know what you are looking for, but they require a lot of exploration and a bit of inferred intuition when you are first getting started. This can make the menus (and overall game experience) difficult and daunting, which is a bit of a drawback. Over time (as I am learning is the case with multiple aspects of this game), however, it does get easier and more fluid.
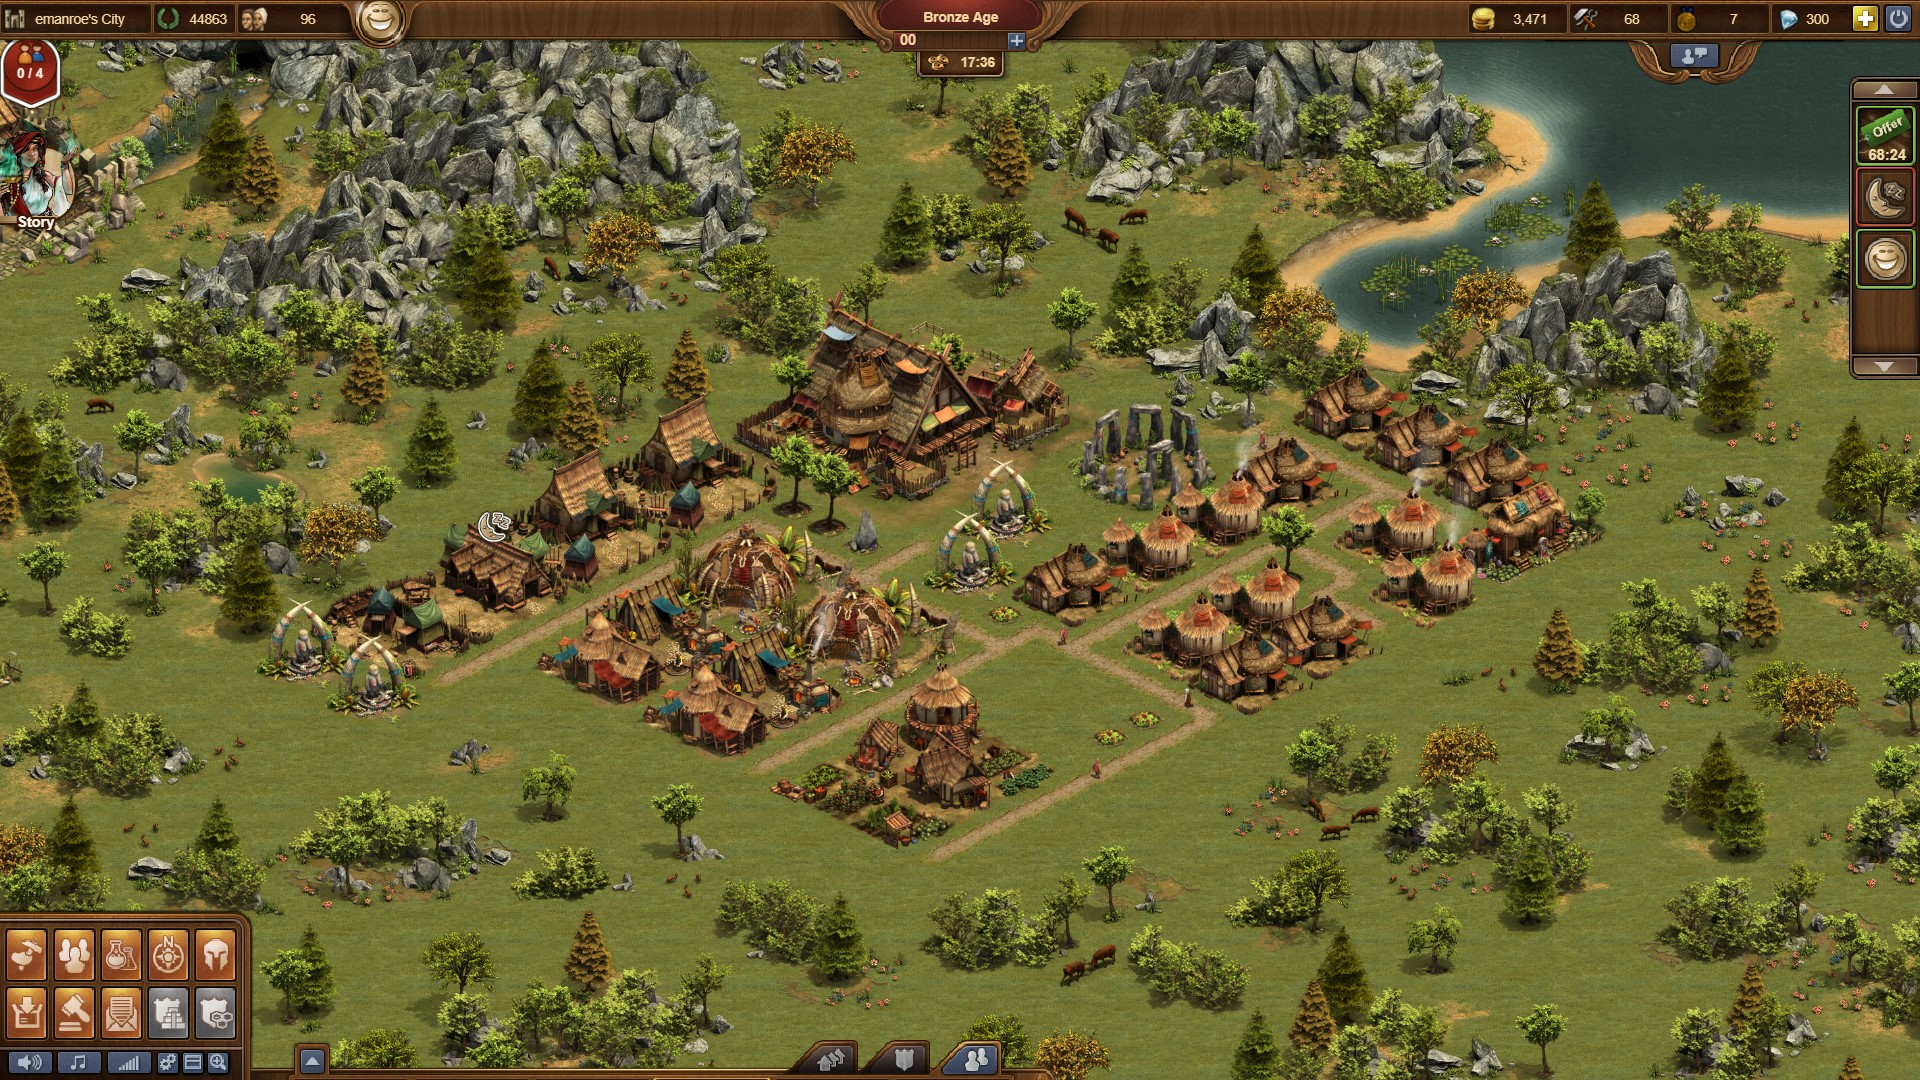
Progress Report
Here is the current standing of my empire! I am learning that the more production and fighter buildings you build, the more of your population you lose to running those buildings. As such, I am slowly switching out my smaller dwellings (like huts and stilt houses) with larger dwellings (like chalets). Also, supplies can be a large limiter! I can usually afford things if they cost coin, but (as you can see below), I always seem short on supplies. Hopefully more production buildings will help!