
Welcome back! First things first: I made it to the Early Middle Ages! Hooray! Check out my Progress Report at the end to hear my preliminary thoughts on the new era. This time around, I am going to explore some of the new features I have unlocked, including city reconstruction, as well as quickly revisit battling (spoiler alert: not much has changed).
City Reconstruction
As you have witnessed throughout my progress reports, I have kept my city somewhat consistent from the beginning. Yes, I have made a few modifications; this was incredibly difficult, however, because I was not able to store and retrieve buildings. This meant that if I wanted to exchange the places of two buildings, I would have to somehow clear a third location to temporarily move one of the buildings, then move the second building, then relocate the temporarily-located building, and finally fix whatever I had to move to clear that place. This is often incredibly complicated, and often impossible without selling buildings and then rebuilding them. The game offers a bonus/special item that allows players to store buildings but they are a “use it and lose it” basis, meaning that once you use the power-up for one building, you cannot use it again. These boosts are incredibly rare, so you definitely do not want to use it unless you absolutely have to.
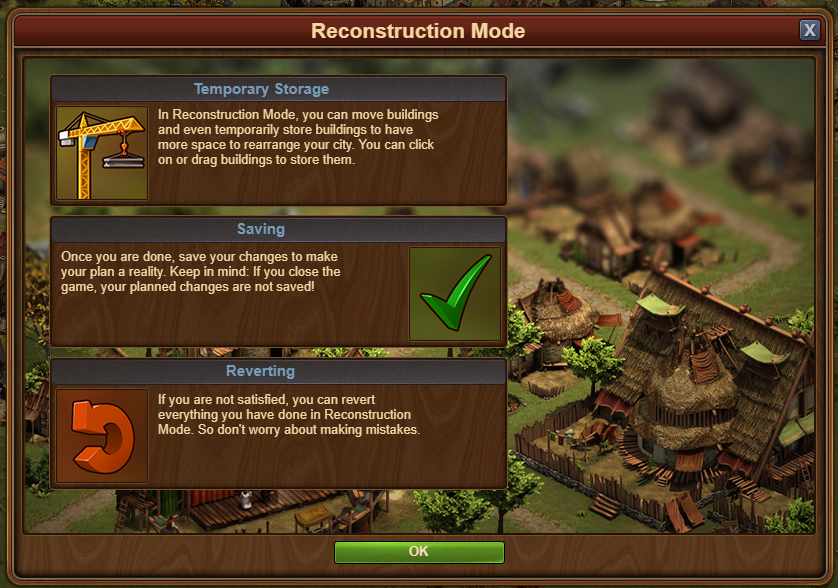
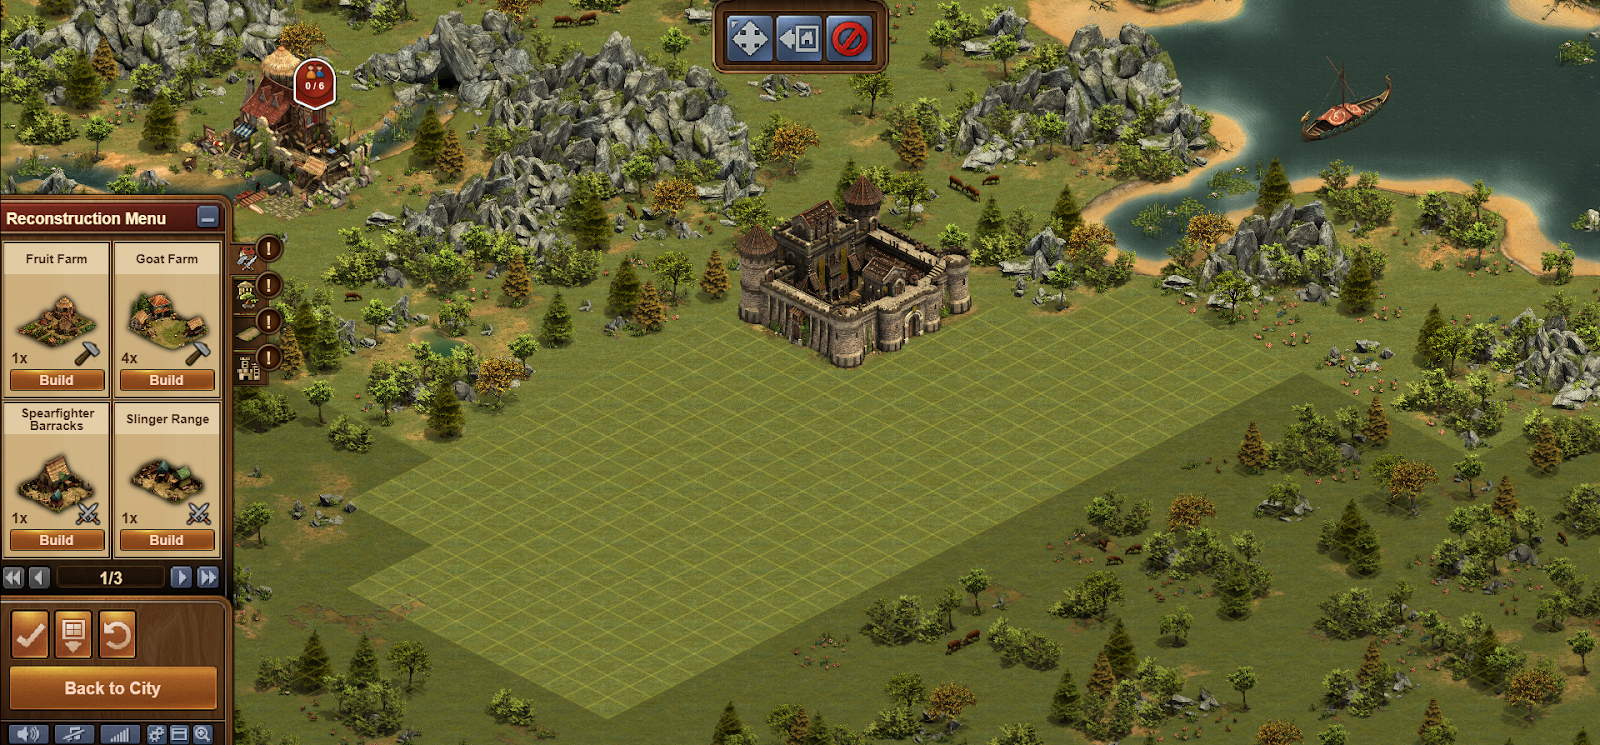
That is, until I researched mathematics at the end of the Iron Age. Enter: The Reconstruction Tool. Little did I know that this tiny crane I unlocked would be so amazing. In the Build menu, choosing the crane in the top toolbar takes the user to “reconstruction mode”; this area allows the user to temporarily store one, multiple, or all buildings and rebuild their town. One of the greatest parts of this tool is that it is completely reversible: if you do not like how your redesign works, you can choose “cancel” and your city will revert back to the orientation it was. If you do like it, however, you can choose “save” and overwrite your current orientation in favor of the redesign.

https://forgeofempires.fandom.com/wiki/Reconstruction_Mode.

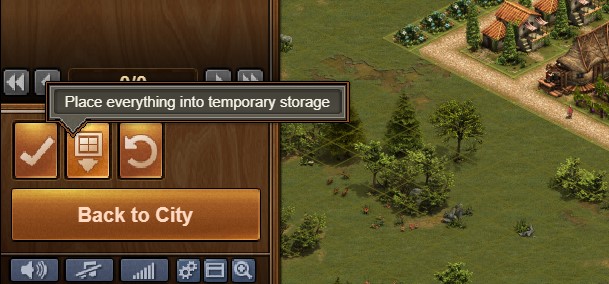
The only caveat is that you have to consume everything that you enter reconstruction with. This means that you cannot leave anything in the temporary reconstruction storage: whatever you have entering reconstruction you have to either re-place or sell. However, temporary storage allows the user to keep their storage bonuses for possible long-term storage later on down the road.
For the first time since I started the game, I cleared my entire town and redesigned it to be more specialized and efficient. Prior to this, I felt like I was trying to put Band-Aids on a popping garden hose: addressing the largest issues first (to the detriment of the smaller issues that would later pose larger problems) and only being able to limit their impacts versus actually being able to fix it. Now, I can mold my town to the coming times, centralizing and organizing it to be the most effective.
I think that the game developers specifically designed this feature as an unlockable technology instead of an ingrained option from the beginning. At the end of the day, it is not incredibly realistic to be able to pick buildings up, store them away, and then re-place them. However, as the user progresses in the game, it is almost necessary to be able to adapt to the growing sizes and demands of the new buildings. Not only that, but new users would most likely not appreciate nor have the overwhelming need for the feature if it is provided off the bat. If you think about the timing of when the feature can be unlocked, it comes right when the user is running out of space (and options) to manually redesign the cities; in this way, the users are overwhelmingly-appreciative of the feature (as you can see in my own response) and also understand the gravity of this ability.
My New City Design
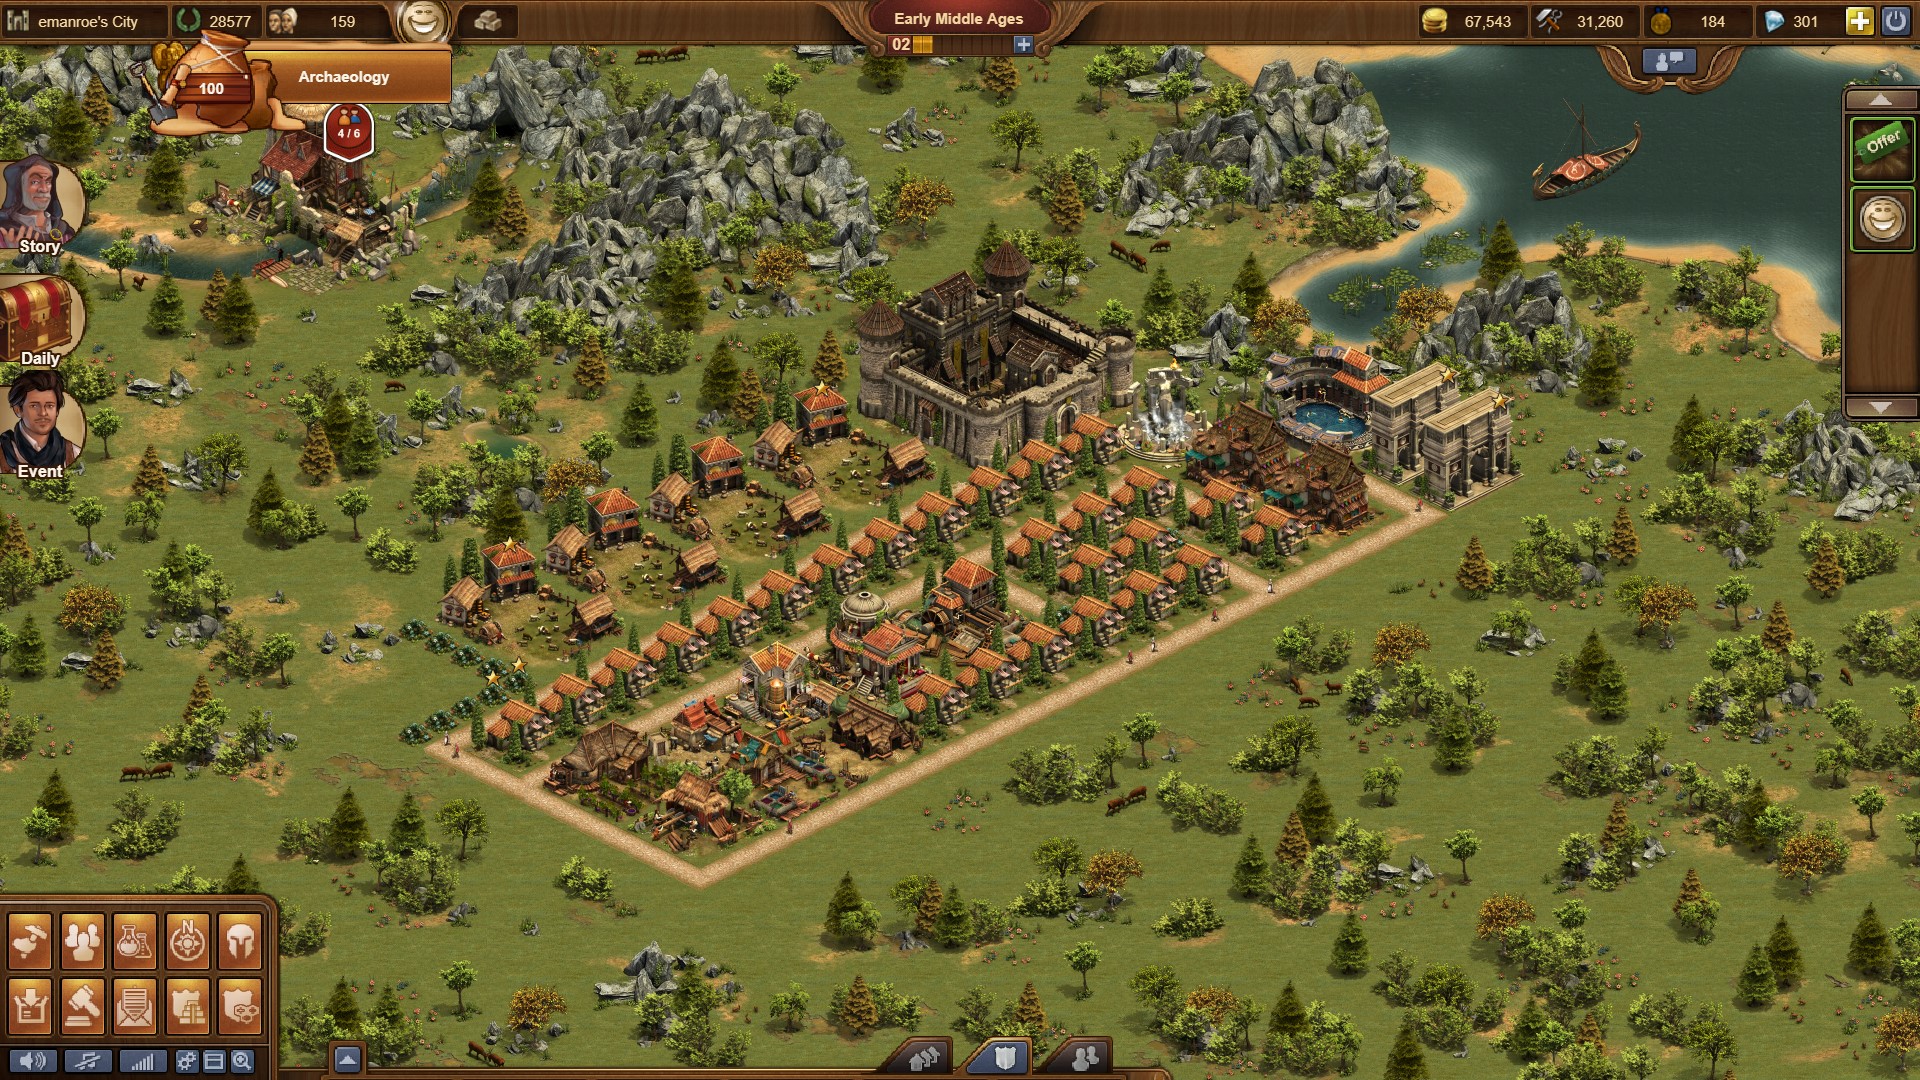
The new reconstruction feature inspired and allowed me to really rethink the structures of my city. I have been updating the city throughout the game, but like I said before, I was minimizing problems instead of actually fixing them. I have now relocated all of my cultural buildings to the edges of the city so they are both out of the way and accessible by outer roads. If you look at my previous progress reports, you will notice that I constructed a few triumphant arches, but I had very little space so they had to go in the middle of the city. This was quite clunky and hard to navigate since they are so tall. Now, however, they are tucked away and I can move on.
I also fixed the orientations of my residences. I tried to concentrate them on the far side of the city, but this required so many roads that I felt I was wasting space. The best thing to do, I knew, was to line them up side-by-side in longer rows so that one stretch of road would be better used; however, I could not previously do this since I could not use the reconstruction feature. Now, things have changed.
I also finally exchanged out almost everything from the Bronze Age. I still had a few military buildings, a fruit farm (produces supplies), two taverns, and a longhouse. As I will discuss further in a bit, I found that military conquesting is not my strong suit; I am much better at producing, trading, negotiating, etc. I only had three military buildings: basic infantrymen, stone thrower, and level one horsemen. I sold the infantrymen and stone throwers (they were outdated against new opponents anyways) and only kept the horsemen. I also sold the fruit farm; per hour, it was producing half of what my Iron Age goat farms are producing, so it just was not worth the space. I have four goat farms and am doing much better managing my supplies amounts, so I will get along just fine without it. I kept the taverns but sold the longhouse. This was an interesting decision; I had kept the longhouse previously because it was a Bronze Age diamond-purchased building (provided by the game for free), so I assumed that it was going to be a high-quality building. For most of the Bronze Age, I was correct, up until the point that I unlocked the cottages. It turns out that the longhouse holds 70 people in a 2×4 area; cottages, however, hold 72 people in a 2×2 area. This means that in the same 2×4 area, I could have 144 people between 2 cottages versus only 70 in the longhouse.
The last thing that I exchanged out were the roads. I did not realize how much road I had until I stored it all during reconstruction: I have 94 plots! Gravel road, an Iron Age product, allows 10 happiness per road plot, meaning I could have 940 happiness without having to take up any more space. Each plot only costs 48 coin and 72 supplies, so exchanging all of my road would cost 4,416 coin and 6,768 supplies. Thinking ahead, I looked for the road that I will unlock coming up in the Early Middle Ages: cobbled road gives 15 happiness per plot, but costs 100 coin and 300 supplies. This means that if I were to wait and exchange my regular road for cobbled road, it would cost 9,400 coin and 28,200 supplies. Comparing the two, I would spend 21,432 more supplies and 4,984 more coin for only 470 more happiness. I’d be better off investing in something better down the road for that high of a cost.
Now that we’ve delved into my city redesign almost ad nauseum (but there is so much to talk about!), let’s quickly move on to battling.
Battling: Part 2
Continent Map
Looking at the battle map, I have made a large amount of progress conquesting regions. However, in actual battle terms, it is quite deceiving: I have had a lot more success producing and negotiating with goods than actually building my army and battling these towns. As you can gather from my explanations above, I have designed my town around production: this does not leave a lot of room for military buildings. Out of conquesting, the army does not serve a purpose. However, producing goods can not only help in the conquesting map but also in researching new technologies and solving negotiations. In this way, I find that I am much more successful progressing through trade, not war.
Not only that, but if you remember from my first battling blog, I cannot understand how the battling actually works. I know that you can move your soldiers some number of squares and they do some damage and some retaliation. Some go first and others go later, and you cannot organize who you want to attack when (at least that I have found). In previous blogs, I have joked about hiring some of the story characters to run my army; I really wish I could. Usually I am able to figure things out and form strategies; I have been playing chess since I was four, so I am pretty good with multiple types of troops squaring off and needing a battery of strategies. Unfortunately, when it comes to this type of battling, I still do not know what I am doing.
I have received a myriad of new warrior classes through the Archaeology tournaments and other odds and ends rewards; they are sitting in my arsenal. If I come across an area that I cannot negotiate, I may end up building a hodge-podge army of these fighters and then auto-battling. That’s a viable option, especially since I do not have any attachment to those battalions; if I lose them, I am not any better or worse off than I was before the battle.
PvP Fights
In the next to last column of research in the Iron Age, I unlocked PvP fights. Wonderful. Does this mean that others may attack me? Maybe. Will this cost me anything? Who knows. Should I be worried? Probably, but I’m not. If it comes around that I am attacked and it costs me a lot of goods, supplies, coins, medals, or anything else (I’m really just throwing things out) then I will adapt and put more efforts into my military. Until then, I’m going to keep everything like it is and keep my trading strategies. Who knows, maybe I will have the ability to trade with my neighbors so they do not burn my whole town down and I can keep with my current strategy. Stay tuned; you’ll know when I know.
Guild Expeditions
If you guessed that I am equally as lost here, you would be right. I feel like with this game, you have the choice between three things: understanding, lots of features, and short time increments. You get two of the three: you either have a deep understanding of a lot of the features but dedicate a lot of time; spend a smaller amount of time, understand what you’re doing, but only in a few of the facets of the game; or spend a smaller amount of time and navigate through a lot of the features, but do not have a deep understanding of them. I went for the second option: dedicate a reasonable amount of time to create a deep understanding surrounding a smaller portion of the game. I understand trading, producing, population, happiness, redesigning, the events, etc., but I am lost when it comes to the military and the guilds. I know that at some point in the Iron Age, I unlocked guilds and guild expeditions; I even joined a guild! I picked the guild I am in, Fresh Start, because I liked the name and it had a bunch of people in it. That means that it is a high-quality guild, right? Sure. I know that joining the guild meant that all of my construction costs were cut by a certain percentage, so that was really great. I also know that I can visit, befriend, and aid my guild members; this helped to pump up my friend’s list and increase the amount of aid in my town as well as the number of people in my tavern. Since joining the guild and befriending my guildmates, I have been able to upgrade my tavern multiple times, so that has been awesome.
As far as guild battlings go, I recently discovered that there is a guild continent map that users can access at any time, as well as a map unique to expeditions. It seems that the guild continent map allows guilds to battle one another, while the expeditions are against the program. Conquests on the guild continent map are cumulative, meaning that members can go in and battle the same area in order to summatively defeat that guild. I do not know how the rewards work with this, if there are rewards, what the goals are, etc. I cannot give much information about the guild expeditions right now because my guild is currently waiting to start the next expedition. What I have learned from some research, however (FoE Wiki is amazing), is that guild expeditions are similar to the individual users’ continent maps: you can progress by fighting or negotiating. Similar to Forge Points, players have to use attempt coins (they look like a tiny compass) in order to negotiate or battle in the expedition. Once they run out, the attempt coins regenerate every hour (one per hour), or can be bought with medals or diamonds. Negotiations remind me of the game “Mastermind”: you start out with a random sequence, and then through clues of “correct”, “wrong person”, and “incorrect”, you deduce which character is demanding which goods. “Wrong person” tells the player that the good in question will go to one of the characters, just not the one that it is currently assigned to. “Incorrect” means that not only does that good not belong to that specific character, but is not actually included in the negotiation at all.
At the end of the expedition, all players involved receive a certain prize; per FoE Wiki, these rewards can be divided into three categories. I have provided the table below:

https://en.wiki.forgeofempires.com/index.php?title=Guild_Expeditions.
Progress Report
Since you can read how I got here at the beginning of the blog, I am going to outline some next steps from here. My current goal is to build up my arsenal of goods so I can continue to progress in research. Towards the end of the Early Middle Ages, I can research and unlock multiple expansions; these expansions will allow me to increase my production buildings, therefore allowing me to negotiate more provinces and research more technologies.

